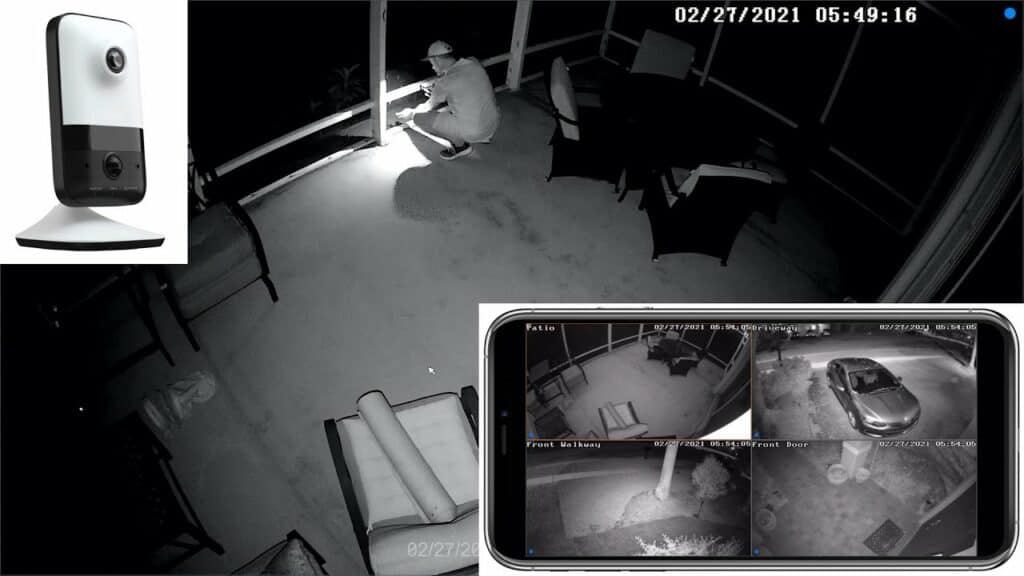
As the sun sets and darkness falls, your security cameras’ night vision must continue providing clear, trustworthy coverage.
Poor night vision can make it difficult to recognize people and activities, so it’s critical to ensure your cameras have dependable night vision capabilities.
Even if you have night vision security cameras, you may wonder how to improve their quality.
According to the Pew Research Center, only 13% of property crimes in the United States are solved. Most police departments need help to collect sufficient evidence to solve crimes.
Fortunately, security cameras can be used to acquire proof of the crime.
The surveillance tape, however, must be clear to represent the suspect’s appearance accurately. Law enforcement can only do something if a security camera’s night vision is clear.
How Do Night Vision Security Cameras Work?
Night vision with infrared imaging illuminates the image in low-light conditions by harnessing infrared light outside the visible spectrum.
Infrared (IR) LEDs or illuminators emit infrared light, which the camera’s sensor detects. The sensor in the camera is designed to see infrared light and transform it into a visible image.
Infrared light, unlike ordinary visible light, is unaffected by darkness or obstructions such as walls or foliage, allowing the camera to capture crisp images even in complete darkness.
This technique improves the camera’s capacity to observe and monitor regions with little or no external lighting, boosting security cameras’ overall night vision capabilities.
Security cameras that use infrared imaging can overcome the constraints of low-light conditions and provide dependable surveillance during the night.
How to Improve Night Vision Security Cameras?
Here are some easy ways to improve the night vision capabilities of your security cameras:
1. Add More Light
This may seem apparent, but adding extra light to your location can significantly improve the nighttime quality of your security camera system.
If the area under observation is well illuminated, the camera can record in color and will not activate the built-in infrared LED lights.
If adding extra light is possible, you should do so. If you have a driveway or a parking lot where you keep your car, you can put a tiny porch light on the side of the building or replace your current light bulb with a brighter one.
You can also add floodlights and path lights around your driveway and use poles to raise the light higher up.
Essentially, additional light sources will assist the security camera in providing a clear and sharp nighttime image.
If there is enough light, color nighttime photographs with greater detail and clarity may be obtained.
2. Install External Infrared LED Lights
As you may know, most security cameras have built-in infrared LEDs that switch automatically when dark and let the camera see its surroundings.
Only the camera can see this light, which is not apparent to the naked eye. Your monitor’s final (live or recorded) image is always black and white.
Unfortunately, these infrared barriers around the camera’s eye are frequently insufficient, if not inferior, and the camera cannot record excellent nighttime photos. Even the distance that the camera can observe is sometimes limited.
If you believe your camera’s infrared light is insufficient, you can supplement it with more external infrared light. These gadgets are illuminators and are an excellent way to illuminate the scene and help your camera see more clearly.
Only the camera can see the lights coming from the illuminator so that you won’t pollute your environment with unneeded visible lights.
Remember that the illuminator should be installed parallel to or farther away from the camera; otherwise, the light may be reflected in the camera.
3. Avoid Light Sources Hitting The Camera Directly
When installing a security camera, keep the light fixtures or sources around the camera in mind. You should never set a camera near a vital light source or let the light fixture’s rays directly reach the camera’s eye.
There’s a reason: a powerful light source close to the camera may blind the sensor, resulting in a white-washed or overly bright image.
The impact is the same whether the light comes directly from a light bulb or is first reflected off a solid surface.
Assume there is a concrete wall; the light from the bulb may reflect off the wall, blinding the camera.
If you can’t avoid the light path, try to keep the light behind or to the side of the camera. As a result, the light bulb should be placed further back than the camera.
4. Avoid Reflected IR Lights
This tip is similar to the previous one in that the camera may be affected by reflected IR radiation from external (normal) light sources.
Allowing unwanted infrared light to enter your camera will severely degrade the nighttime image.
The fascinating thing is that the installer is unaware of what is causing the nighttime image to diminish.
Assume you have the camera fixed somewhere in your facility, and it is properly angled.
The daytime image may be bright and clear, but the nighttime image could be better, with no discernible subjects.
The IR lights being reflected from a nearby solid surface, such as the soffit around the camera or the wall itself, is one of the main reasons the nighttime image lacks clarity.
The surface that reflects infrared light to the camera does not even have to be visible to the camera’s sensor.
Any direct or reflected IR light, whether in direct view or nearby, will create artifacts or make a nighttime image overly bright. The footage may need to be more usable.
To avoid this problem:
- Verify the location where you intend to install the camera.
- Once placed, aim or angle it correctly to avoid any nearby solid surfaces.
- Monitor your nighttime photographs for a few nights and adjust until you’re satisfied with the image.
5. Ensure That Your Camera Is Switching To Night Mode
During the day, each camera contains an “IR cut filter” that filters out infrared radiation. This filter is required for the camera to create accurate color photos, but it must be removed at night for the camera to view its infrared LED lights.
When you go to night mode on your camera, the image changes from color to black and white, and the IR cut filter is automatically removed from the lens. When this occurs, you should hear a quick click sound.
However, the camera does not auto-switch in some circumstances, so it must rely on ambient light to see in the dark.
If that is sufficient, it will be unable to perceive anything. It will appear pitch black, or it may notice something but will be too dark to see.
6. Get A Superior Low-Light Camera
A low-cost CCTV camera will only produce a rudimentary night vision image that is blurry, black, and full of artifacts.
You get what you paid for, as the phrase goes. Don’t anticipate a dependable evening image if you go cheap.
If you intend to utilize a security camera in an area with little or insufficient illumination or in the woods, you should invest in a higher-quality camera.
A superior camera performs better in low-light situations, and external illuminators are not always required.
Look around the market for a camera built to function in low-light situations. The higher the resolution, the better the image; the more built-in infrared lights, the better the image.
If that location is crucial to you, invest a few dollars more in a good camera.
7. Clean The Cameras
It is critical to keep the cameras and illuminators clean. The IR light may be reflected in the camera’s sensor due to dirt, dust, scratches, or general pollution.
Furthermore, bugs and spiders adore the IR lights and will swarm to the camera for some reason.
Wiping the camera’s glass once every 2-3 months or after each season is advised.
Remove any spider webs that have formed around the camera, as the IR light from the camera hits the net and bounces back, blinding the sensor and lowering image quality.
In Conclusion,
As you can see, the nighttime image quality is tied to a few fundamental concepts you should remember while placing a CCTV camera.
The camera sees at night by employing infrared lights inside the camera; the greater the IR lights, the better the nighttime image.
The quality of the image is usually proportional to the camera’s price; if you go too cheap, nighttime photographs may be worthless.
You can also use external illuminators to help the camera see better. Remember to install the illuminator behind or to the side of the camera.